Concrete floors are the foundation of many residential, commercial, and industrial spaces. Over time, floors can become uneven due to settling, heavy traffic, or improper installation. Uneven floors can cause safety hazards, affect flooring installation, and lead to costly repairs.
Why Concrete Floors Become Uneven
Concrete floors can become uneven for several reasons:
-
Settling of the foundation: As buildings age, the underlying soil may shift, causing the floor to sink or rise.
-
Poor installation: Inconsistent pouring or insufficient curing can result in low spots or bumps.
-
Heavy loads: Equipment, furniture, or high foot traffic can wear down certain areas faster than others.
-
Moisture issues: Water intrusion can weaken concrete, leading to cracks or uneven surfaces.
Recognizing the cause of the problem is important because it determines the appropriate leveling method and tools needed.
Methods for Leveling Concrete Floors
There are several methods to achieve a level surface, ranging from simple DIY fixes to professional-grade solutions.
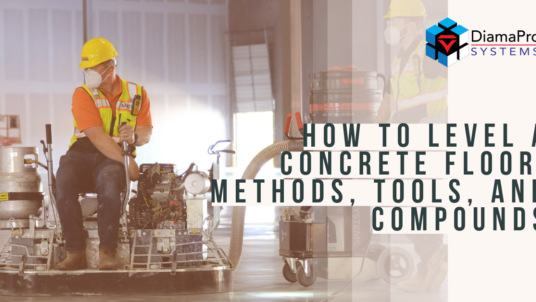
1. Grinding High Spots
For floors with minor unevenness, grinding down high spots is often the simplest solution. This method uses a concrete grinder or polisher to remove raised areas until the floor is even. For effective results, pair grinding with high-quality abrasives. Check out our Diamond Abrasives for efficient and durable options.
2. Self-Leveling Compounds
When low spots are present, concrete floor leveling compounds are ideal. These compounds are poured over the floor and spread using a trowel or squeegee. They naturally flow into depressions, creating a smooth, flat surface. This method is excellent for floors that need minor to moderate leveling before installing new flooring, such as tile, vinyl, or epoxy coatings.
3. Screeding and Resurfacing
For floors with significant unevenness, more extensive methods like screeding or resurfacing may be required. This involves applying a new layer of concrete over the existing floor and using a screed board to ensure an even finish. It’s a more labor-intensive process but ensures long-term stability and uniformity.
4. Grinding and Patching Combination
Sometimes, the best approach is a combination of grinding high areas and filling low spots with a leveling compound. This method ensures a perfectly flat floor while using materials efficiently.
Essential Tools for Concrete Floor Leveling
The right tools make leveling concrete floors easier and more precise. Some essential equipment includes:
-
Concrete grinders: Ideal for removing high spots and smoothing rough areas. For professional-grade options, explore our Polished Concrete Equipment.
-
Surface preparation equipment: Tools like shot blasters, scarifiers, and floor grinders prepare the floor for optimal adhesion of leveling compounds.
-
Trowels and squeegees: Essential for spreading self-leveling compounds evenly.
-
Mixing tools: Proper mixing ensures a smooth, lump-free compound. Use a paddle mixer for best results.
Using high-quality tools not only improves results but also reduces the effort and time required to achieve a flat, durable surface.
Choosing the Right Concrete Floor Leveling Compound
Selecting the appropriate concrete floor leveling compound is critical. Consider these factors:
-
Floor condition: Assess whether your floor has minor dips or requires extensive filling.
-
Compound type: There are different formulations, including rapid-setting and standard compounds. Rapid-setting options allow faster installation and quicker flooring application.
-
Thickness requirements: Some compounds are ideal for thin applications, while others handle deeper depressions.
Always follow manufacturer instructions for mixing ratios, drying times, and application techniques to ensure the floor remains level and durable.
Steps to Level a Concrete Floor
Here’s a simplified step-by-step process:
-
Prepare the floor: Remove debris, dust, and coatings using surface prep equipment. This ensures proper adhesion of the leveling compound.
-
Identify high and low spots: Use a straightedge or laser level to map uneven areas.
-
Grind high spots: Use a concrete grinder with quality diamond tooling to smooth raised areas.
-
Apply leveling compound: Mix and pour the compound into low spots. Use a trowel or squeegee to spread evenly.
-
Allow drying: Follow the manufacturer’s recommended drying time. Avoid heavy traffic until fully cured.
-
Final touch-ups: After curing, inspect the floor for minor imperfections and touch up as needed.
Following these steps ensures a smooth, flat, and durable floor suitable for any type of flooring.
Benefits of Proper Concrete Floor Leveling
Leveling concrete floors provides several advantages:
-
Improved safety: Reduces trip hazards caused by uneven surfaces.
-
Enhanced flooring installation: Ensures tiles, vinyl, or epoxy coatings adhere properly without gaps or cracks.
-
Extended durability: Prevents further damage caused by uneven weight distribution.
-
Aesthetic appeal: Creates a clean, professional look for residential or commercial spaces.
By investing in proper leveling techniques, you increase both the functionality and longevity of your concrete floor.
Conclusion
Learning how to level a concrete floor is essential for both DIY enthusiasts and professionals. Whether using grinding, self-leveling compounds, or a combination approach, the right tools and equipment make the process efficient and effective, ensuring precise results and long-lasting performance.
Proper concrete floor leveling not only improves safety and aesthetics but also prepares your space for new flooring installations, making it a worthwhile investment for any property.