Concrete consists of cement, sand, coarse aggregate, and water. There could also be chemical admixtures included to enhance the workability of the plastic concrete or the ultimate performance of the cured slab. The amount of water added is based on the amount of cement and the designed final strength.
Water has two purposes in the mix. The first is to hydrate the cement. When water and cement combine, a chemical reaction happens. Over time, the combination becomes a hardened mass. The amount of water required to hydrate a bag of cement (94lbs.) is 24lbs. That would have a .24 water-to-cementitious (W/C) ratio. Most design mixes call for a .45-.50 water-to-cementitious ratio. That means half of the water in the concrete mix is not doing anything. Or is it?
If you try to place a .24 W/C ratio mix design, it would be like working with modeling clay. It would have no flow characteristics at all. It needs an additional flow agent to be placed without fighting it. This is where the additional water in the mix comes into play. The additional water is the flow agent needed. It is called water for convenience.
When concrete cures it loses volume and shrinks. The shrinkage stems from the water of convenience evaporating from the concrete before it becomes hard. When a concrete slab is placed, stress relief areas are cut into the slab. These cuts are called control joints.
According to the American Concrete Institute (ACI), control joints should be placed throughout the entire floor to minimize unwanted cracking. The distance apart each joint should be 2.5 times the thickness of the slab in feet. If your slab is 6” in depth, multiply the thickness of 6” by 2.5 which equals 15. A 6” slab should have control joints cut every 15’. Now there are special mix designs that allow the spacing to be extended, but that is not the norm. The depth of each cut should be 25% of the thickness of the slab or deeper. For a 6” thick slab the cut should be 1.5”. The joint is cut with a ¼” wide concrete saw blade.
Control joints perform two duties. The first is to put a weakened plane in the concrete slab. Concrete will crack in areas that are not as strong as other areas. By cutting a joint, you are creating a weak area. If the saw cut pattern is configured correctly, most, if not all the cracking will happen within the saw cut control joint minimizing unwanted random cracks.
Concrete is like a sponge. It absorbs and releases moisture as the temperature and humidity fluctuate within the building. If the space is not air conditioned this will happen often throughout the year. As the moisture moves in and out of the slab, the concrete slab will expand and contract causing movement. Although the movement is slight; it puts enough stress on the concrete slab to cause cracking. The movement will happen in the control joints reducing the potential for additional cracking.
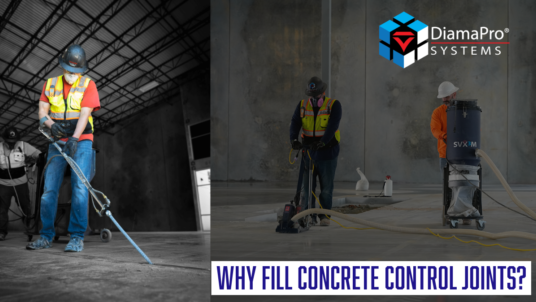
Why seal or fill control joints?
Once cut, control joints are open voids in your concrete floor. Depending on the environment, they could harbor contaminants that grow bacteria and other harmful contaminates. By filling them, the floor will be easier to clean. Dirt and grime will no longer be trapped within the joint space.
Many facilities that have concrete floors will subject the floor to forklift traffic. Forklifts have small-diameter wheels that can carry very heavy loads. When a forklift rolls over an open control joint, the wheels will impact the joint shoulder causing deterioration. Over time, the deterioration spreads along the impacted area. It will eventually become so severe that the wheel impact will destroy the wheel bearings on the forklift or become a void where a wheel can sink into a cause a potential tip hazard. By filling the joint, forklifts will be able to roll easily over the joint. The joint filler will bridge the joint gap developing a smooth surface to travel over.
Joint filler types
There are several joint fillers to choose from. There are soft and hard ones. The soft joint materials expand and contract very well. If you have a high-movement joint, they will remain adhered to the joint sides. The problem with soft joint fillers is that they do not allow for wheel traffic to roll over the joint without sinking, causing joint shoulder damage. If the filler is hard with a great bond strength, they are great to transfer wheel loads from one side to the other but if there is any joint movement, it will lose bond or crack the concrete next to the joint.
The ideal control joint filler should have medium-level bond strength, soft enough to manage a small amount of movement, but hard enough to support heavy wheel traffic. DiamaPro® Diama-Joint Filler is that type of material. It is a semi-ridged polyurea 2-component resin that has adequate bond strength. The hardness allows for wheel traffic to move freely over the joint without risking joint shoulder damage.
DiamaPro® Diama-Joint Filler Plus contains Microban®, an antimicrobial additive to minimize the growth of both bacterial and fungal microbes. If the filled joint is subjected to more movement than the material can manage, the bond between the filler and concrete will separate and a void will appear. The void is the ideal place where microbes can grow and multiply. Microban® will attack the reproductive system of each microbe so they can no longer repopulate, eventually dying off. This works very well keeping the joints free from microbe growing contaminants.
How to fill a control joint
Joint surface preparation is especially important. The sides of the joint need to be free from all bond-inhibiting materials. Run a concrete joint saw down the open joint to clean and roughen the sides. After, vacuum well to remove any dust produced by the saw.
Semi-ridged joint materials are two-component resins. They might be epoxy or polyurea-based resin. Most can be tinted or come pre-colored to satisfy a design scheme. The material is packaged in 600ml side-by-side cartridges with a static mixing nozzle or in 10-gallon units. The bulk material is dispensed through a plural component pump. The pump moves the 1 to 1 mix ratio material through a static mixing nozzle at a variable rate determined by the operator. This allows the joints to be filled with great ease. The joints in a large warehouse floor can be filled in a short time using this method.
When filling the joints, you want to overfill the joint with material. This ensures the complete joint is filled. Once the placed material has taken an initial set, usually within an hour, the excess material is then shaved level with the floor using a sharp scraper blade. This will enable wheel traffic to move seamlessly over the joint.
Potential issues
Control joint materials are semi-ridged with minimal expansion and contraction capabilities. They will allow for about 5% +- joint movement before they lose the bond. If the joint opens more than that, there will be a designed separation at the bond line between the joint filler and the side of the joint. This should not be confused with a material failure.
The tensile strength of a concrete slab is about 10% of its compressive strength. A 4,000-psi slab will have a tensile strength of about 400 psi. The bond strength of most control joint fillers is 450-500 psi. The material is designed to break away from the joint wall not to damage the concrete joint. If it were higher, the concrete would crack next to the joint requiring an expensive repair. The weakest ink in the system will always fail first. That is why the material's bond strength is as low as it is.
If there is a separation at the bond line due to high joint movement, the material will still provide a bridge for forklifts to travel over the joint without impacting the joint shoulder. Owners might want to repair the separation. By removing the affected area and cleaning the joint wall down to bare concrete, the joint can be refilled with the same material. Note: if the joint moves greater than 5% again, the separation will reoccur.
Many control joint fillers are moisture-sensitive during the curing process. Water will be trapped within the material and could jeopardize the performance. To ensure success, always make sure the joint is 100% free of water.
Conclusion
Control joints are cut into a concrete slab shortly after the concrete has been placed. These joints are to direct or control where the shrinkage cracking will occur. If control joints are not cut, the cured slab will exhibit unwanted random cracking throughout the floor. Once the material has been installed, forklift traffic will move easily over the joint, and debris will not impact into the joint.
Having control joints filled is an additional upfront cost that will reduce potential concrete and forklift repairs in the future. It is a small price to pay to increase the service life of the floor. For all material and equipment needs, contact DiamaPro Systems. We provide the knowledge and expertise to guide you through the process!